
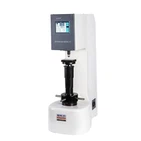
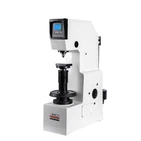
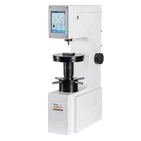

Rockwell Hardness Tester Calibration: Ensuring Accurate Measurements
Calibration is the cornerstone of reliable hardness testing. It is the process of comparing a measurement device-in this case, a Rockwell Hardness Tester-against a known standard to verify its accuracy. Just as a musical instrument must be tuned before a performance, a hardness tester must be calibrated regularly to produce trustworthy results. Without proper calibration, even the most sophisticated equipment can yield misleading data, leading to defective products, costly recalls, and potential safety hazards. This guide provides a comprehensive overview of why calibration matters, how to perform it correctly, and best practices for maintaining your equipment in compliance with international standards such as ASTM E18 and ISO 6508.
Why Calibration Matters
Accuracy Assurance
The primary purpose of calibration is to ensure that the hardness readings produced by your tester accurately reflect the true hardness of the material being tested. Over time, factors such as wear and tear, environmental conditions, and regular use can cause a hardness tester to drift out of specification. Regular calibration identifies and corrects these deviations, providing confidence that every test result is both accurate and repeatable.
Compliance with International Standards
For industries operating under quality management systems like ISO 9001 or IATF 16949, compliance with recognized test methods is mandatory. The Rockwell hardness method is defined in ISO 6508 and ASTM E18, which are the two most widely accepted standards for determining the hardness of metals and, to some extent, plastics. These standards specify not only the testing procedures but also the verification and calibration requirements for testing machines and indenters. Adhering to these standards ensures that your results are defensible, traceable, and accepted by customers and regulatory bodies worldwide.
Extended Equipment Life
Calibration is not just about accuracy, but also a form of preventive maintenance. By regularly verifying the performance of your tester, you can detect emerging issues such as indenter wear, load cell drift, or mechanical misalignment before they escalate into major failures. This proactive approach minimizes costly downtime and extends the service life of your equipment.
The Calibration Process
Pre-Calibration Preparation
Before beginning the calibration procedure, several preparatory steps should be taken to ensure valid results:
- Clean the Equipment: Ensure that the indenter, anvil, and test block surfaces are free from dirt, oil, or other contaminants. Even small particles can alter indentation geometry and lead to erroneous readings.
- Inspect for Wear: Visually examine the indenter for signs of dulling, chipping, or deformation. Check the load application mechanism for smooth operation. Any damaged component should be replaced before proceeding.
- Verify Environmental Conditions: Conduct calibration in a stable environment, ideally within the temperature and humidity ranges recommended by the manufacturer. Extreme conditions can cause thermal expansion or contraction of critical components, affecting measurement accuracy.
Step 1 – Select Certified Standard Test Blocks
Calibration relies on reference materials with precisely known hardness values, known as standard test blocks or calibration blocks. These blocks are manufactured and calibrated according to strict procedures specified in standards such as ISO 6508-3, which defines methods for calibrating reference blocks used for indirect and daily verification of Rockwell hardness testing machines. When selecting a test block, choose one with a hardness value close to the range you routinely test. For example, if you primarily test hardened steel (HRC 40-60), use a calibration block with a certified value within that range.
Step 2 – Perform Calibration Tests
With the test block securely mounted on the anvil, follow the standard testing procedure for the specific Rockwell scale you intend to verify (e.g., HRC, HRB, HRA). Perform at least three indentations at different locations on the block, ensuring that indentations are spaced at least three diameters apart to avoid work-hardened interference. Record each hardness value displayed by the tester.
Step 3 – Compare and Analyze Results
Calculate the average of the measured values and compare it to the certified hardness value of the test block. According to ASTM E18 and ISO 6508, the deviation between the measured average and the certified value must fall within specified tolerances. If the deviation exceeds the allowable limit, the tester requires adjustment.
Step 4 – Adjust the System
If discrepancies are detected, adjustments can be made according to the manufacturer's instructions. For many Rockwell testers, this involves calibrating the scale or adjusting the load application mechanism. In cases where the indenter is found to be worn or damaged, replacement with a certified indenter is necessary. For advanced digital models, adjustment may be performed through software calibration routines.
Step 5 – Verification After Adjustment
Following any adjustment, repeat the calibration tests using the same test block (or a second block of similar hardness) to confirm that the tester now produces readings within the acceptable tolerance range. If multiple Rockwell scales are used (e.g., both HRC and HRB), each scale must be verified separately using test blocks of appropriate hardness levels.
Documentation and Traceability
All calibration activities should be thoroughly documented. Record the date of calibration, the test blocks used (including their certified values and serial numbers), the measured values obtained, any adjustments made, and the name of the technician performing the procedure. This documentation provides traceability, supports compliance with quality management standards, and establishes a historical record that can help identify long-term drift or emerging performance issues.
Frequency of Calibration
There is no universal answer to how often a Rockwell Hardness Tester should be calibrated. The optimal frequency depends on several factors, including usage intensity, environmental conditions, and the precision requirements of your industry.
Usage-Based Guidelines
- Heavy Use (multiple times per day): In high-volume production environments such as automotive manufacturing plants or steel mills, where the tester is used continuously, calibration may be required weekly or even daily. At a minimum, monthly calibration is recommended for busy facilities.
- Moderate Use (once or twice per week): For medium-sized manufacturing facilities or quality control laboratories with regular but not continuous usage, semi-annual calibration is typically sufficient.
- Light Use (less than once per week): In research laboratories or small workshops where the tester is used sporadically, annual calibration may be adequate. However, basic visual inspections for damage or wear should still be performed before each use.
Daily Verification
In addition to periodic full calibration, ASTM E18 and ISO 6508 require a daily verification procedure. This involves testing a certified reference block at the beginning of each day that hardness tests are to be performed, or whenever the indenter, anvil, or test force is changed. The daily verification serves as a quick check to confirm that the machine has not drifted out of specification since its last calibration. Results should be recorded and compared to the block's certified value.
Environmental Factors
Harsh operating environments accelerate wear and can affect accuracy. Facilities with high levels of dust, humidity, or extreme temperatures should adopt more frequent calibration schedules. For example, a foundry where the tester is exposed to high temperatures and airborne particulates might require calibration every two to three months, whereas a controlled laboratory environment might only need calibration every six to twelve months.
Manufacturer's Recommendations
Always consult your equipment manufacturer's manual for specific calibration interval recommendations. Manufacturers conduct extensive testing to determine optimal intervals based on their product's design and quality.
After Repair or Maintenance
Calibration must be performed immediately after any repair, replacement of parts (such as the indenter or load cell), or significant maintenance activity.
Common Errors Affecting Calibration
Several factors can compromise the accuracy of Rockwell hardness measurements. Being aware of these common error sources helps in both calibration and routine troubleshooting.
Worn or Damaged Indenter
The indenter is the component that directly contacts the test specimen, and it is subject to gradual wear over time. A dull or chipped indenter will produce irregular indentations, leading to inconsistent or inaccurate readings. Diamond indenters should be inspected periodically using a microscope. If wear is suspected, the indenter should be replaced with a certified component. For ball indenters used in HRB testing, the ball must be free from flat spots or deformation.
Improper Load Application
Incorrect load application can result from mechanical issues such as a worn load cell, misaligned linkage, or insufficient hydraulic/oil pressure in the damping mechanism. During the loading process, sudden impacts caused by insufficient or excessively dirty buffer oil can also lead to unstable results. Regular verification of test forces using a calibrated force-measuring instrument is essential to ensure that the applied loads conform to the requirements of the selected Rockwell scale.
Sample Preparation and Mounting
The surface of the test specimen must be clean, flat, and smooth. Scratches, dirt, or surface irregularities can affect how the indenter penetrates the material, leading to erroneous readings. Additionally, the specimen must be properly supported on the anvil. Any movement or rocking during the test will introduce error.
Environmental Influences
Temperature fluctuations cause thermal expansion or contraction of both the tester components and the test specimen, affecting indentation depth measurements. High humidity can lead to corrosion of metal parts, while dust and debris can interfere with moving components. Performing calibration and routine testing in a controlled environment minimizes these effects.
Operator Technique
Even with a perfectly calibrated machine, operator error can introduce variability. Common mistakes include failing to ensure perpendicular contact between indenter and specimen, applying the load too quickly or too slowly, and misreading the display (on analog models). Proper training and the use of digital, automated systems help reduce operator-dependent errors.
Frequently Asked Questions
Q1: Can the calibration process be automated?
Yes, many advanced digital Rockwell Hardness Testers feature automated calibration routines. These systems use internal sensors and software algorithms to verify accuracy and make adjustments with minimal operator intervention. However, the use of certified reference blocks remains essential even with automated systems.
Q2: What tools are required for calibration?
The essential tools for calibrating a Rockwell Hardness Tester are certified standard test blocks (reference blocks) with known hardness values. For in-depth verification, additional tools such as calibrated force-measuring instruments (load cells) and optical inspection equipment for examining indenters may be required.
Q3: Who should perform calibration?
Daily verification can and should be performed by trained operators. Full calibration and any adjustments involving internal mechanical or electronic components should be carried out by qualified technicians or certified calibration professionals. For critical applications or regulatory compliance, using an accredited calibration laboratory is strongly recommended.
Q4: How long does a calibration take?
Daily verification typically takes only a few minutes. A full calibration, including multiple test points and potentially adjustments, may take 30 minutes to an hour depending on the complexity of the tester and the number of Rockwell scales being verified.
Q5: What happens if my tester fails calibration?
If a tester fails calibration (i.e., measured values deviate beyond allowable tolerances), it should be taken out of service immediately. The cause of the failure must be diagnosed-this could be a worn indenter, load system drift, or other mechanical issue. After repairs or adjustments are made, the tester must be recalibrated successfully before being returned to routine use.
Conclusion
Regular calibration of your Rockwell Hardness Tester is not merely a recommendation-it is an essential practice for ensuring measurement accuracy, maintaining compliance with international standards such as ASTM E18 and ISO 6508, and protecting the quality of your products. By establishing a disciplined calibration schedule, using certified reference blocks, training operators thoroughly, and documenting all activities, you can achieve consistent, reliable hardness measurements that support your quality control objectives and long-term operational success.
For professional calibration services, certified reference blocks, or expert guidance on maintaining your Rockwell hardness testing equipment, please contact us today.
