
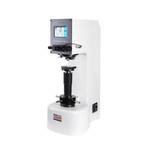
Maintaining YourBrinell Hardness Tester for Long-Term Performance
The Brinell hardness tester is a cornerstone of quality control in industries ranging from steel manufacturing and foundries to heavy machinery production and aerospace. Its ability to provide accurate, representative hardness measurements for large, coarse-grained materials makes it an indispensable tool. However, like any precision instrument, a Brinell hardness tester requires regular, systematic maintenance to deliver reliable results over its entire service life. Neglecting proper care can lead to measurement drift, inconsistent readings, premature component wear, and ultimately, costly downtime or product quality escapes. This guide provides a comprehensive overview of best practices for maintaining your Brinell hardness tester, ensuring long-term accuracy, compliance with international standards, and maximum return on your investment.
Why Regular Maintenance Is Essential
Hardness testing is often a gatekeeper function in manufacturing-determining whether raw materials are accepted, processes are in control, or finished products are ready for shipment. A poorly maintained hardness tester can produce results that are inaccurate, inconsistent, or both, leading to severe consequences. Regular maintenance is the foundation of confidence in every hardness measurement you make.
Accuracy Assurance
All mechanical and electronic components experience wear over time. Moving parts such as lead screws, guide rails, and load application mechanisms develop friction and backlash. Optical systems accumulate dust. Indenters lose their precise geometry. Regular calibration and component checks ensure that the tester continues to produce accurate, reliable measurements that you can trust.
Compliance with International Standards
Brinell hardness testing is governed by rigorous standards including ASTM E10 and ISO 6506. These standards require regular verification of the testing machine's performance using certified reference hardness blocks. For laboratories and production facilities operating under quality management systems such as ISO 9001 or IATF 16949, documented maintenance and calibration records are mandatory for audit compliance.
Extended Equipment Life
Proactive maintenance-including cleaning, lubrication, and timely replacement of worn components-prevents minor issues from escalating into major failures. A well-maintained Brinell hardness tester can provide decades of reliable service, while a neglected one may require expensive repairs or premature replacement.
Operator Safety
A hardness tester that is not properly maintained may exhibit erratic behavior, including uncontrolled load application or unexpected movements. Regular inspection of electrical systems, hydraulic components, and mechanical interlocks helps ensure safe operation for all personnel.
Routine Maintenance Tasks
Cleaning: The First Line of Defense
Contamination is one of the most common enemies of accurate hardness testing. Dust, dirt, oil, metal chips, and other debris can interfere with indentation formation, optical measurement, and mechanical operation.
Daily Cleaning Checklist:
- Wipe down the outer casing with a clean, soft cloth after each use to prevent dust from entering the interior of the instrument.
- Clean the indenter and anvil using a soft, dry brush or lint-free cloth to remove any loose dirt or debris.
- For more thorough cleaning, use a soft cloth slightly dampened with isopropyl alcohol (IPA) or ethanol. Avoid harsh chemicals or abrasives that could damage critical surfaces.
- Use compressed air or cotton swabs to reach crevices and difficult-to-access areas.
- Ensure that the test area is free from oil, scale, or other contaminants before each test.
Notes for Hydraulic Systems:
For hydraulic Brinell hardness testers, periodically check for oil leakage around the bronze bushing. If the O-ring becomes worn, oil may leak from the hydraulic sump, compromising load application. If leakage is detected, the O-ring and bushing should be replaced, and fresh hydraulic oil filled to the proper level before returning the tester to service.
Optical and Digital Imaging Systems:
Modern Brinell hardness testers increasingly incorporate digital imaging systems with CCD cameras for automated indentation measurement. These optical components require special care:
- Clean lenses regularly using dedicated lens paper or lint-free cotton swabs lightly moistened with lens cleaner or isopropyl alcohol.
- Never touch optical surfaces with bare fingers, as oils from the skin can leave residues that degrade image quality.
- If the optical system becomes misaligned or the image appears blurry even after cleaning, consult a qualified service technician rather than attempting disassembly yourself.
Lubrication: Keeping Moving Parts Smooth
- Proper lubrication reduces friction, minimizes wear, and ensures smooth, consistent operation of moving components.
Lubrication Schedule:
- Friction surfaces (lead screw and hand wheel contacts, guide rails): Lubricate 2 times per month with adequate machine oil.
- Lead screw: Check lubrication every six months and add appropriate lubricating oil as needed.
- Reducer gearbox: Fill with grease (industrial Vaseline) once every half year.
- General maintenance: Apply a light coating of oil to the lifting screw, anvil, and other moving surfaces of the tester periodically.
When lubricating, use only the lubricants recommended by the equipment manufacturer. Over-lubrication can be as problematic as under-lubrication, attracting dust and creating sticky residues that impede movement.
Indenter Maintenance and Inspection
The indenter is the component that directly contacts the test specimen. Its condition directly affects every measurement you make.
Daily Visual Inspection:
Before each use, visually inspect the tungsten carbide ball indenter for signs of wear, flattening, scratches, or rust. Any visible damage warrants immediate replacement.
Periodic Dimensional Inspection:
The diameter of the tungsten carbide ball must be maintained within tight tolerances specified in ISO 6506 and ASTM E10. Acceptable tolerances are:
- 2.5 mm ball: ±0.003 mm
- 5 mm ball: ±0.004 mm
- 10 mm ball: ±0.005 mm
Replacement Guidelines:
- Replace the ball indenter immediately if any wear, damage, or deformation is detected.
- For high-volume testing of hard materials (e.g., hardened steel, cast iron), more frequent replacement may be necessary.
- Always use certified tungsten carbide balls from reputable suppliers to ensure compliance with international standards.
Checking Indenter Security:
During testing, occasionally check whether the carbide ball remains securely seated in the indenter holder. A loose ball will produce invalid test results and may damage the specimen or the tester. If the ball is loose, clean the ball groove with acid-free gasoline, dry thoroughly, apply a small amount of acid-free Vaseline, reseat the ball, and tighten the fixing nut securely.
Anvil and Worktable Maintenance
The anvil supports the test specimen during indentation. Any debris or damage on the anvil surface will affect the stability of the specimen and, consequently, the accuracy of the measurement.
- Keep the worktable and anvil surfaces clean and flat.
- Regularly remove debris, chips, and stains from the measurement table.
- Check for burrs on the back of specimens that could cause uneven support.
- Verify that the selected anvil is appropriate for the specimen geometry (e.g., flat anvil for flat specimens, V-anvil for cylindrical parts).
Electrical System Inspection
Electrical system faults can cause erratic operation, display errors, or complete failure of the tester.
Scheduled Electrical Checks (recommended annually):
- Inspect the power cord for damage or aging. Replace immediately if cracks, fraying, or exposed conductors are found.
- Verify that all electrical connections are secure and free from corrosion.
- Confirm that the tester is properly grounded (earth ground).
- Check that the supply voltage matches the tester's requirements (typically 220V, 110V, or 380V depending on the model).
- For digital testers, ensure that firmware and software are up to date.
Troubleshooting Electrical Issues:
- If the motor does not rotate and makes no sound when the start button is pressed, check the power supply, fuses, and reversing switch contacts.
- If the tester stops when the full load is applied, check for burned or eroded contacts in the reversing switch or overheating of the motor or other components.
- Error messages on digital displays may indicate communication errors, sensor faults, or calibration issues. Consult the manufacturer's manual for specific error codes.
Load Cell and Load Application Verification
For Brinell hardness testers with electronic closed-loop control systems, the load cell is critical for maintaining test force accuracy.
- Periodically verify the applied test force using a calibrated load cell or proving ring traceable to national standards (e.g., NIST). Take a minimum of three readings at each applicable load.
- For hydraulic systems, check that the hydraulic oil level is adequate and that the system can apply the full rated test force (typically 3000 kgf) without difficulty.
- If load errors exceed ±1.0% or the load is unstable, inspect the load knife edge for wear or looseness, check the compression spring for corrosion or damage, and recalibrate the machine using certified standard hardness blocks.
Calibration: The Cornerstone of Accuracy
Calibration is the process of comparing the measurements of your Brinell hardness tester against a known standard and making adjustments to correct any discrepancies. It is the single most important maintenance activity for ensuring result validity.
Daily Verification (Periodic Inspection)
According to ASTM E10 and ISO 6506, the hardness tester must be checked periodically using certified reference hardness blocks. This verification should be performed:
- Daily before the start of the test schedule
- Whenever the indenter is changed
- Whenever the anvil is changed
- Whenever the test force is changed
- After any repair or significant maintenance activity
If the tester is used only once per week, the verification should be performed on that day. For three-shift operations, verification should be performed at the beginning of each shift.
Verification Procedure:
- Select a certified reference hardness block with a value close to the expected hardness of the materials you will be testing.
- Clean the indenter, anvil, and test block surfaces to remove any contaminants.
- Perform at least three indentations on the block, ensuring proper spacing between indentations.
- Measure each indentation diameter and calculate the Brinell hardness value.
- Compare the average of your measurements to the certified value of the block.
- If the deviation falls within the allowable tolerance (specified in ISO 6506 and ASTM E10), the tester is verified for use. If not, full calibration and adjustment are required before further testing.
Full Calibration Frequency
The appropriate calibration frequency depends on usage intensity, the materials being tested, and environmental conditions.
- High-volume production laboratories: Every 3-6 months.
- Quality control laboratories: Every 6-12 months.
- R&D and low-usage environments: Every 12 months.
- After any repair, significant movement, or impact shock: Immediately.
For testers used frequently (daily or multiple times per day), monthly calibration is recommended. For less frequent use, calibration every three to six months may be sufficient.
Using Certified Reference Hardness Blocks
Certified Brinell hardness reference blocks are calibrated in accordance with ISO 6506-3, ASTM E10, and/or GB/T 231.3, and are traceable to national or international standards.
Important considerations for reference blocks:
- Always use blocks certified for the specific Brinell scale and approximate hardness level you need.
- Blocks have a finite service life. Steel and iron reference blocks should generally be replaced every 5 years. Aluminum-alloy and copper-alloy blocks have shorter validity periods and should be replaced every 2 to 3 years.
- Store blocks in a dry, clean environment to prevent corrosion. Always follow the supplier's storage recommendations.
- Never use a block beyond its expiration date. The surface of expired blocks may have work-hardened from repeated use, or the certified value may no longer be accurate.
Documentation and Traceability
All calibration and verification activities must be thoroughly documented to support quality management system compliance and audit requirements.
Records should include:
- Date of verification/calibration
- Tester identification (model, serial number)
- Reference block identification (serial number, certified value, expiration date)
- Measured values and calculated hardness results
- Any adjustments made
- Name/signature of the technician performing the procedure
- Next scheduled calibration date
